이전 포스팅의 aws ec2 인스턴스 생성에 이어서 진행된 내용입니다.
AWS EC2 인스턴스 생성 및 트러블 슈팅 (tistory.com)
AWS EC2 인스턴스 생성 및 트러블 슈팅
1. EC2 인스턴스 생성 AWS 가입 후 무료 사용 1년으로 EC2 인스턴스를 생성하였다. 메뉴: 서비스 - 컴퓨팅 - EC2 - 애플리케이션 및 OS 이미지 Ubuntu 나머지는 기본. - 키 페어 ssh 접속을 위해서 키 페어를
sangjjang.tistory.com
- docker-compose.yml 작성
#version: '3.8'
name: nginx

services:
  nginx:
    image: nginx
    container_name: nginx # 사용할 컨테이너 이름
    environment:
      - TZ=Asia/Seoul
    ports:
      - 80:80 # 외부 포트 : 내부 포트
      - 443:443
    volumes: # 외부 경로 : 컨테이너 내부 경로
      #      - /dkr/nginx/config/nginx.conf:/etc/nginx/nginx.conf
      - /dkr/nginx/config/conf.d:/etc/nginx/conf.d
    restart: always
- version
이전 버전과의 호환성을 위해 compose 사양에 정의되어 있다.
작성하지 않으면, 가장 최근의 스키마를 선호? 상속된다.
Version and name top-level elements | Docker Docs
Version and name top-level elements
Understand when and if to set the version and name top-level element
docs.docker.com
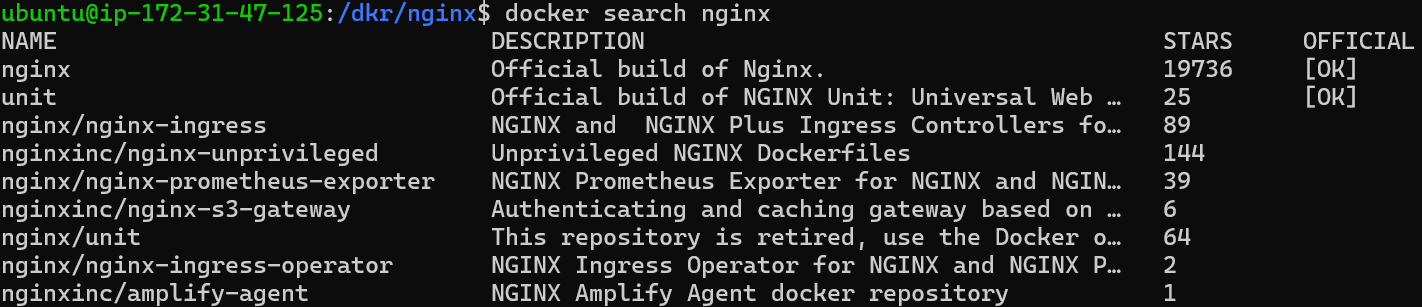
- image
docker container에 사용할 이미지
docker search [검색어]
사용할 수 있는 이미지가 검색된다.
- container_name
사용할 컨테이너 이름
- ports
외부 포트 : 컨테이너 내부 포트
- volumes
외부 경로 : 컨테이너 내부 경로
nginx의 기본 설정 경로가 /etc/nginx 경로이다.
container가 잡히면, 기본 설정 경로 기준으로 volume을 잡아준다.
nginx conf설정은 그대로 사용하고, 추가로 사용할 proxy.conf만 잡아준다.
- 실행
docker compose up -d

- docker container 접속
docker exec -it [컨테이너명] bash

- nginx 설정 파일 / conf 파일 기본 경로
/etc/nginx/nginx.conf
/etc/nginx/conf.d/default.conf
- conf 파일의 기본 문법 구조

Creating NGINX Plus and NGINX Configuration Files | NGINX Documentation
Creating NGINX Plus and NGINX Configuration Files | NGINX Documentation
Creating NGINX Plus and NGINX Configuration Files Understand the basic elements in an NGINX or NGINX Plus configuration file, including directives and contexts. NGINX and NGINX Plus are similar to other services in that they use a text‑based configurati
docs.nginx.com
- nginx.conf
nginx의 기본 설정 파일이다.
user  nginx; # 프로세스 실행 권한. 보안상 root를 사용하지 않는다.
worker_processes  auto; # 몇 개의 워커 프로세스 생성지정. 1 이면 하나의 프로세스, 보통 auto, cpu 코어랑 연관

error_log  /var/log/nginx/error.log notice; #에러로그, 에러레벨[debug | info | notice | warn | error | crit]
pid        /var/run/nginx.pid; # 프로세스 pid 정보


events {
    worker_connections  1024; # worker_process가 동시에 처리할 수 있는 접속자의 수
}


http {
    include       /etc/nginx/mime.types; # 포함시킬 외부파일을 정의
    default_type  application/octet-stream; # 웹서버의 기본 Content-Type을 정의

    log_format  main  '$remote_addr - $remote_user [$time_local] "$request" '
                      '$status $body_bytes_sent "$http_referer" '
                      '"$http_user_agent" "$http_x_forwarded_for"'; # 로그 형식을 지정

    access_log  /var/log/nginx/access.log  main;

    sendfile        on;
    #tcp_nopush     on;

    keepalive_timeout  65;

    #gzip  on;

    include /etc/nginx/conf.d/*.conf;
}
- default.conf
nginx.conf에서 작성된 include 된 서버 설정 관련 파일이다.
공식 문서에서는 기능별 파일 분할이라고 되어 있다.
nginx.conf파일을 보면, http 블록 안에 include /etc/nginx/conf.d/*. conf;라고 되어 있다.
nginx conf파일 문법 구조와 함께 봤을 때, http 가상 서버 설정을 추가할 수 있는 부분이다.
server {
    listen       80;
    listen  [::]:80;
    server_name  localhost;

    location / {
        root   /usr/share/nginx/html;
        index  index.html index.htm;
    }

    error_page   500 502 503 504  /50x.html;
    location = /50x.html {
        root   /usr/share/nginx/html;
    }
}
server 블록과 server 블록 안에 location 블록을 추가해서 내용을 정의할 수 있다.
이번에 공부하면서 중요하게 보였던 부분이 server_name과 location 패턴 부분이다.
location 패턴내용 참조 - NginX에서 location 패턴 : 네이버 블로그 (naver.com)
NginX에서 location 패턴
요청 URI와 비교할 패턴을 지정할 수 있다. location [=|~|~*|^~|@] pattern { … } 맨 앞에 오는 선택...
blog.naver.com
브라우저에서 server_name + location 이 매핑이 되는 것으로 판단된다.
다시 위에서 docker nginx 설정 부분으로 와서,
docker nginx에서 volume을 잡았던 proxy.conf
server {
        listen 80;
        server_name jenkins.test.com;

        location ~* {
                proxy_pass http://eth0[아이피]:9090;
        }
}
jenkins.test.com이라는 url 요청이 들어오면 docker jenkins로 proxy_pass 한 설정이다.
여기서, 내 컴퓨터 hosts 파일에 해당서버아이피와 해당 도메인을 적용해야 접속할 수 있다.


그리고 [aws 메뉴 - 보안그룹]에서 인바운드 규칙으로 http, 80 포트로 접속할 수 있게 설정한다.
여기까지 기본 아이피 접속하면 nginx 기본 페이지가 열릴 것이고, jenkins.test.com이라고 접속하면 jenkins 페이지가 열릴 것이다.


nginx 설정하면서, 아주 기본적인 내용에 대해서 공부한 듯하다.
443 포트의 https 관련 내용도 좀 더 공부해서 포스팅해야겠다.
이상 끝.
'IT > WSL' 카테고리의 다른 글
| docker compose - jenkins, github 연동 (0) | 2024.03.31 |
|---|---|
| AWS EC2 인스턴스 생성 및 트러블 슈팅 (0) | 2024.03.30 |
| WSL에 도커(Docker)를 설치하자. (0) | 2024.02.28 |
| WSL 을 설치해보자 (0) | 2024.02.20 |
| docker 에 mysql 설치/삭제 (1) | 2024.02.17 |
| 윈도우용 도커(Docker)를 설치하자. (0) | 2024.02.14 |
| [Linux] TMOUT=0 / 세션 타임 아웃 설정 (0) | 2023.06.05 |
| [Linux] vi 편집기에서 문자열 찾기 (0) | 2022.12.30 |
| 프로세스 확인 명령어 (0) | 2022.07.06 |
| 중요 디렉토리 (0) | 2020.05.13 |